Home
HomeMaster the Art of AI Image Creation with Microsoft Designer: Your Comprehensive Guide
Microsoft Designer provides an intuitive platform where you can bring your creative concepts to life using AI-generated images. This guide details the steps for crafting custom prompts, sharing them with others, and producing impressive visuals. Whether you're an experienced designer or new to the field, using AI for image creation can elevate your projects and simplify your workflow. Let's explore the capabilities of AI-powered design and learn how to craft engaging images with Microsoft Designer's Image Creator.
Key Points
Visit designer.microsoft.com to access Microsoft Designer's Image Creator.
Develop a custom prompt to produce specific AI-generated images.
Share your prompt as a reusable template for others to adapt.
Mark variable sections within the prompt to enable user personalization.
Download the resulting images for use in your various projects.
For optimal outcomes, focus on detail, avoid unsuitable language, and be mindful of potential AI inaccuracies.
Getting Started with Microsoft Designer Image Creator
Accessing the Image Creator
To start creating AI-powered images, first go to designer.microsoft.com
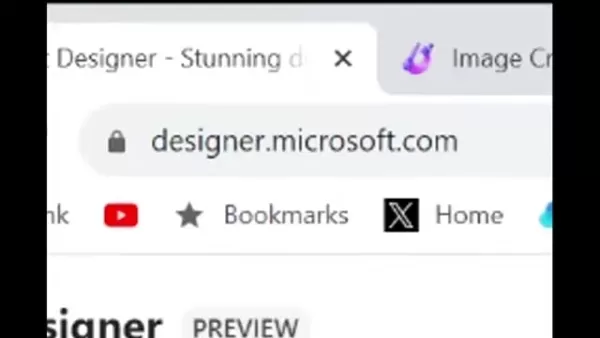
. This serves as the main hub for Microsoft Designer, offering a suite of AI-driven design tools. Make sure you have a Microsoft account; if not, you can sign up for free. After signing in, you'll see the Designer homepage, which presents various design options and tools. The Image Creator is easily accessible, letting you quickly begin generating visuals from your descriptions.
Using the Image Creator is simple. The interface guides you to enter a description of the image you have in mind. Microsoft's AI then processes your text to generate images that match your specifications. This approach is designed to be user-friendly, enabling people of all skill levels to create professional-looking images with ease.
By completing these initial steps, you're ready to harness the power of AI in your design process. Explore the possibilities, try different prompts, and observe how AI can enhance your creative work.
Understanding the Microsoft Designer Interface
After accessing the Image Creator
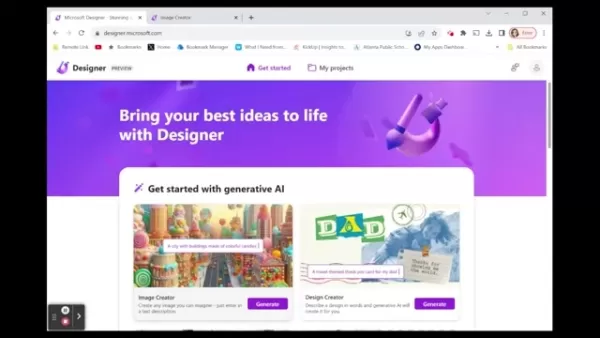
, take time to learn the interface to maximize its features. The main component is the Prompt box, where you type the description of the image you wish to generate. This box is your entry point to AI-driven creativity, so writing clear and detailed prompts is crucial for achieving the best results.
Below the prompt box, you'll often see examples and suggestions to spark your imagination. These can be useful if you're looking for starting points or need ideas to improve your prompts. The interface also lets you browse previously generated images, so you can review and adjust your past creations. Since Microsoft frequently updates the interface, keeping up with new features can improve your experience.
The interface includes areas to manage your projects, access tutorials, and engage with the wider Microsoft Designer community. Use these resources to broaden your knowledge, find inspiration, and solve any issues you face. Understanding the interface well allows you to use the tool effectively, experiment with prompts, and realize your creative potential.
Crafting and Sharing Custom Prompts
Creating Effective Prompts
Writing effective prompts is essential for generating the AI images you want. The more descriptive and precise your prompt, the better the AI can interpret your vision and deliver accurate outcomes. Here are some suggestions for creating compelling prompts:
- Be Specific: Use exact language to describe the components of your image. Include information about colors, objects, and the overall setting. For instance, instead of a vague prompt like 'a landscape,' try 'a sunset over snow-capped mountains with a frozen lake in the foreground'.
- Add Adjectives: Adjectives help clarify the qualities and features of your image. Use descriptive terms like 'vibrant', 'serene', 'dynamic', or 'whimsical' to convey specific emotions and styles.
- Consider the Style: Indicate the artistic style you prefer, such as 'photorealistic', 'watercolor', 'oil painting', or 'cartoon'. This guides the AI to align with your creative preferences.
- Include Context: Provide background to help the AI grasp the environment and relationships between elements. For example, 'a futuristic city at night' is more effective than just 'city'.
By including these elements in your prompts, you can direct the AI to produce images that closely reflect your creative intent, leading to more satisfying and impactful visuals.
Remember to keep experimenting with different prompts and refining them based on the images generated. This iterative process is key to mastering AI-driven image creation and achieving professional-quality results.
Sharing Prompts as Templates
Sharing prompts as templates
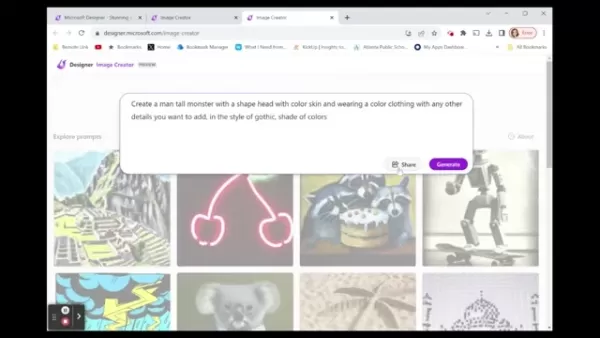
in Microsoft Designer’s Image Creator is an effective way to collaborate and inspire others. By converting your prompts into templates, you enable others to customize and adapt your creative ideas to their own requirements. This encourages collaboration and allows others to learn from your expertise.
To share your prompt as a template, follow these steps:
- Create Your Prompt: Begin by writing a detailed and effective prompt that produces an image you're happy with.
- Click 'Share': In the Image Creator interface, find the 'Share' button next to your prompt.
- Select 'Share as Template': Choose the option to share your prompt as a template. This opens a new window where you can adjust the template settings.
- Highlight Variable Fields: Identify the parts of the prompt that you want others to modify. These could include colors, objects, styles, or other descriptive aspects.
- Add Custom Fields: For each variable field, add a custom field that users can easily change. This makes the template user-friendly and adaptable to different creative visions.
- Generate and Share the Link: After customizing the template, create a shareable link. You can distribute this link to others, allowing them to access and use your prompt as a template.
By sharing your prompts as templates, you contribute to a collaborative creative environment and help others discover the potential of AI-driven image creation. Use this feature to extend your influence and foster innovation within the design community.
Customizing Shared Prompts
Customizing shared prompts is a crucial part of using templates effectively. When you receive a prompt shared as a template, you can adjust it to meet your specific creative needs, ensuring the generated images match your unique vision. Here's how to customize shared prompts:
- Access the Template: Click the shared link to open the prompt template in Microsoft Designer’s Image Creator.
- Identify Variable Fields: Examine the template to find the customizable fields marked by the creator. These fields are intended for easy modification to suit your preferences.
- Modify Custom Fields: Click on each custom field to input your desired values. You might alter colors, objects, styles, or other descriptive elements to tailor the prompt to your needs.
- Generate the Image: After modifying the custom fields, click the 'Generate' button to create an image from your customized prompt. The AI will process your changes and produce an image that reflects your unique vision.
- Refine and Experiment: If the generated image isn't what you expected, adjust your customizations and generate again. Try different values to achieve the desired outcome.
By customizing shared prompts, you can turn a general template into a highly specific and personalized creation. This process lets you benefit from others' expertise while maintaining your creative control, resulting in more innovative and impactful visuals. Embrace customization to explore the endless possibilities of AI-driven image generation.
Step-by-Step Guide to Using Microsoft Designer's Image Creator
Step 1: Accessing Microsoft Designer
First, you'll need to go to Microsoft Designer's website. Open your preferred web browser and type designer.microsoft.com into the address bar.Press Enter to load the page.
If you already have a Microsoft account (such as an Outlook or Xbox account), you can sign in with your credentials. If you don't have an account, you can create one for free. Look for the 'Sign Up' or 'Get Started' button and follow the instructions to set up your new account.
After signing in, you'll arrive at the main dashboard where you can explore the various design tools available in Microsoft Designer. This is your starting point for your AI-powered design journey.
Step 2: Navigating to Image Creator
Once you're on the Microsoft Designer dashboard, find the 'Image Creator' option.It's usually prominently displayed, often with a visual icon. Click on 'Image Creator' to open the AI image generation tool.
This will take you to the Image Creator interface where you can start entering your prompts to generate images. The interface is designed to be user-friendly, making it easy for both beginners and experienced designers to begin with AI image creation.
Step 3: Crafting and Entering Your Prompt
Now that you're in the Image Creator interface, you'll see a prompt box where you can enter your text description of the image you want to generate. This is where your creativity comes into play.
Think about the image you want to create and describe it in as much detail as possible. Consider:
- Subject: What is the main focus of the image?
- Setting: Where is the image taking place?
- Style: What artistic style do you want (e.g., photorealistic, cartoon, oil painting)?
- Colors: What colors should be prominent in the image?
- Mood: What emotion or feeling should the image evoke?
For example, instead of simply writing 'a cat,' you could write 'a fluffy ginger cat sitting on a windowsill bathed in golden sunlight, photorealistic style.'
Once you're satisfied with your prompt, enter it into the prompt box.
To enhance your prompting skills, consider the following table of prompt components:
Component Description Example Subject The main focus of the image 'A majestic lion' Setting The environment or location where the image takes place 'in a vibrant African savanna' Style The artistic style you want to emulate 'oil painting style' Colors The dominant colors that should be present in the image 'with warm, earthy tones' Mood The emotion or feeling the image should convey 'evoking a sense of tranquility' Camera Angle Perspective from which the image is captured 'wide-angle shot' Lighting The type and direction of lighting in the image 'soft, diffused lighting' Resolution/Detail Level of detail and sharpness in the image 'high resolution' Extra Details Any additional elements or features to include 'with a gentle breeze blowing through its mane'
Using the right terminology in your prompts helps the AI better understand the subtleties of your request, improving the relevance and quality of the generated image.
Step 4: Generating the Image
After you've entered your prompt, click the 'Generate' button.
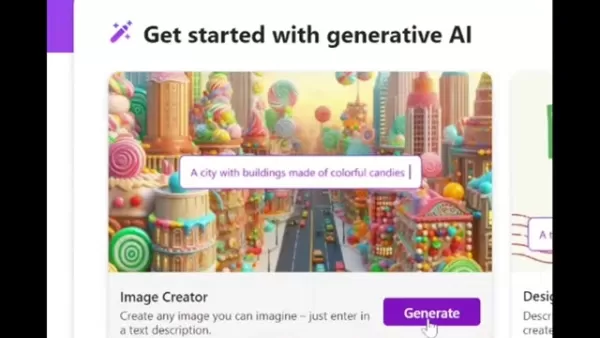
Microsoft Designer will now use its AI algorithms to create images based on your description.
The generation process may take a few moments, depending on the complexity of your prompt. Be patient and wait for the images to appear. Typically, the system provides 3-4 different versions of the image based on your prompt, allowing you to choose the one that best fits your vision.
Step 5: Reviewing and Downloading Your Image
Once the images are generated, take some time to review them. Consider which one best matches your vision and the details in your prompt.
If you're not satisfied with the results, you can refine your prompt and generate again. Experiment with different wording, add more details, or change the style to see how it affects the output.
Once you find an image you like, click on it to open a larger view. You'll see options to download the image to your computer. The image will be saved in a high-quality format that you can use in your design projects or share with others . You can also copy the image.
By following these steps, you can easily create and download impressive AI-generated images using Microsoft Designer, enhancing your creative workflow and bringing your ideas to life.
Microsoft Designer Pricing and Plans
Understanding the Cost
Microsoft Designer aims to be accessible to a broad audience, including students, educators, and creative professionals. The pricing structure reflects this goal by offering a combination of free and premium options. The free version of Microsoft Designer gives you access to core features, allowing you to explore AI-driven design without any initial cost.
For more advanced capabilities, Microsoft provides premium plans that are often included with Microsoft 365 subscriptions. These plans unlock additional features, such as higher-resolution image generation, priority processing, and expanded storage. Keep in mind that pricing can change, so it's wise to check the Microsoft Designer website or your Microsoft 365 account for the most current information.
Value Proposition of Premium Plans
Premium plans offer considerable value for users who need more robust design capabilities. These plans typically include:
- Higher-Resolution Images: Generate and download images with greater detail and clarity, suitable for professional projects and high-quality prints.
- Priority Processing: Enjoy faster image generation times, ensuring your prompts are processed quickly, even during busy periods.
- Expanded Storage: Store a larger number of generated images and design assets, helping you manage your creative work more efficiently.
- Exclusive Features: Access advanced AI features and tools not available in the free version, giving you a competitive advantage in your design workflow.
These benefits make premium plans a valuable investment for designers who rely on Microsoft Designer for their professional projects.
Pros and Cons of Microsoft Designer's Image Creator
Pros
User-friendly interface suitable for beginners.
Seamless integration with other Microsoft products.
AI-powered image generation for quick and easy creation of visuals.
Custom prompt creation for tailored results.
Prompt sharing as templates for collaboration and inspiration.
Cons
Dependence on AI algorithms, which may not always perfectly match user intent.
Limitations on generating certain types of content due to community standards.
Fewer customization options compared to more advanced AI image generation tools.
Potential for 'hallucinations' (inaccurate or nonsensical image elements).
Key Features of Microsoft Designer's Image Creator
AI-Powered Image Generation
At its core, Microsoft Designer's Image Creator uses advanced AI algorithms to convert text prompts into stunning visuals. These algorithms are trained on extensive datasets of images and artistic styles, enabling them to interpret a wide variety of descriptions and generate images that closely align with the user's intent. The AI can understand nuances in language, allowing for creative and expressive prompts that result in highly detailed and accurate images.
Custom Prompt Creation
The ability to create custom prompts
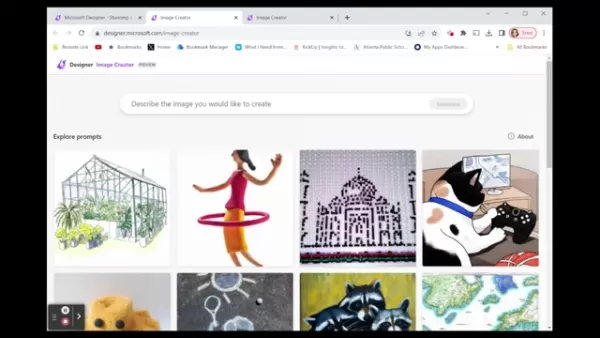
is a fundamental feature of the Image Creator. Users can input detailed text descriptions, specifying the subject, setting, style, colors, and mood of the desired image. This level of customization empowers users to bring their unique creative visions to life and generate images tailored to their specific needs. The more descriptive and specific the prompt, the better the AI can understand and execute the user's intent.
Prompt Sharing as Templates
Microsoft Designer allows users to share their custom prompts as templates, enabling others to benefit from their creative expertise. By highlighting variable fields within the prompt, creators can let others customize key elements, such as colors, objects, or styles. This feature promotes collaboration and encourages a community-driven approach to AI-powered image generation.
Image Downloading and Sharing
Once an image is generated, users can easily download it in a high-quality format for use in their projects. The Image Creator also provides options to share images directly to social media platforms or other design tools, streamlining the workflow and making it simple to integrate AI-generated visuals into a broader creative process. The ability to quickly download and share images enhances the overall user experience and encourages the adoption of AI in design.
Reminders and Tips for Optimal Results
To help users achieve the best possible results, Microsoft Designer offers reminders and tips for effective AI image generation. These include guidance on crafting detailed prompts, avoiding inappropriate language, and being aware of potential 'hallucinations' (inaccurate or nonsensical image elements). By following these recommendations, users can improve the accuracy and quality of their generated images.
Practical Use Cases for Microsoft Designer's Image Creator
Educational Projects
Microsoft Designer’s Image Creator
is a valuable tool for educational projects. Students can use it to generate visuals for presentations, reports, and assignments, enhancing their learning experience and making their work more engaging. Teachers can create custom graphics for lesson plans, classroom materials, and educational games, improving the quality of their instruction.
Marketing and Social Media Content
Businesses and marketers can leverage the Image Creator to produce compelling visuals for their marketing campaigns and social media content. They can generate custom graphics for ads, blog posts, and social media updates, attracting attention and driving engagement. The AI-powered image generation can also help create consistent branding across different platforms.
Personal Creative Projects
Individuals can use the Image Creator for a wide range of personal creative projects. They can generate custom artwork for their websites, blogs, or social media profiles, expressing their unique style and personality. The Image Creator can also be used to produce personalized gifts, greeting cards, and invitations, adding a special touch to personal occasions.
Design Mockups and Prototypes
Designers and developers can use the Image Creator to quickly generate mockups and prototypes for their projects. They can visualize design concepts and experiment with different styles and layouts, streamlining the design process and improving collaboration with clients and stakeholders. The AI-powered image generation can also help create realistic previews of products and interfaces.
Frequently Asked Questions
What is Microsoft Designer's Image Creator?
Microsoft Designer's Image Creator is an AI-powered tool that generates images from text prompts. It allows users to create custom visuals by simply describing the image they want to generate. This tool is part of the Microsoft Designer suite and is designed to be user-friendly for both beginners and experienced designers.
How do I access the Image Creator?
To access the Image Creator, go to designer.microsoft.com . You'll need a Microsoft account to sign in. If you don't have one, you can create one for free. After signing in, look for the Image Creator option and click on it to start generating images.
Is Microsoft Designer's Image Creator free?
Microsoft Designer offers a mix of free and premium options. The free version provides access to core features, allowing users to explore AI-driven design without any upfront costs. For more advanced functionalities, Microsoft offers premium plans that are often bundled with Microsoft 365 subscriptions.
What are some tips for crafting effective prompts?
To craft effective prompts:Be specific with your descriptions.Use descriptive adjectives.Specify the desired artistic style.Provide context to help the AI understand the scene.Experiment and refine your prompts based on the generated images.
How can I share my prompts as templates?
To share your prompts as templates, create your prompt, click the 'Share' button, select 'Share as Template,' highlight variable fields, add custom fields, and generate a shareable link. This allows others to customize and use your prompt.
What should I do if the generated image doesn't match my expectations?
If the generated image doesn't meet your expectations, refine your prompt and generate again. Experiment with different wording, add more details, or change the style to see how it affects the output.
What are 'hallucinations' in AI image generation?
'Hallucinations' occur when the AI generates incorrect or nonsensical image elements. To minimize this, avoid generating with the same prompt more than 10 times and ensure your prompts are clear and specific.
Related Questions
How does Microsoft Designer's Image Creator compare to other AI image generation tools?
Microsoft Designer’s Image Creator offers a user-friendly interface and seamless integration with other Microsoft products. While other AI image generation tools like DALL-E 2, Midjourney, and Stable Diffusion provide advanced customization options, Microsoft Designer stands out for its ease of use and accessibility for beginners.DALL-E 2, developed by OpenAI, is known for generating highly detailed and creative images from text prompts. It offers a wide range of customization options, allowing users to fine-tune their creations. However, it requires a paid subscription and can be more complex to use than Microsoft Designer.Midjourney is another popular AI image generation tool that operates through a Discord server. It is renowned for its artistic and surreal image outputs, making it a favorite among digital artists and designers. However, its reliance on a Discord interface can be less intuitive for some users.Stable Diffusion is an open-source AI image generation model that offers exceptional flexibility and customization. It allows users to run the model on their own hardware, providing complete control over the image generation process. However, it requires technical expertise to set up and use effectively.Overall, Microsoft Designer’s Image Creator strikes a balance between ease of use and functionality, making it an excellent choice for users who want to quickly generate high-quality images without a steep learning curve.
What are the limitations of Microsoft Designer's Image Creator?
While Microsoft Designer’s Image Creator is a powerful tool, it has some limitations. These include:Dependence on AI Algorithms: The quality of the generated images relies heavily on the underlying AI algorithms. Although these algorithms are continually improving, they may not always produce images that perfectly match the user's intent.Inability to Generate Certain Content: The Image Creator is designed to follow Microsoft's community standards and guidelines. As a result, it may not generate images that are sexually suggestive, violent, or otherwise inappropriate.Limited Customization Options: Compared to more advanced AI image generation tools, Microsoft Designer offers fewer customization options. Users may have less control over the fine details of their creations.Potential for 'Hallucinations': As with any AI-powered tool, there is a possibility that the Image Creator may generate inaccurate or nonsensical image elements ('hallucinations'). Users should carefully review the generated images and refine their prompts if needed.Despite these limitations, Microsoft Designer’s Image Creator remains a valuable tool for generating custom visuals quickly and easily. As the AI algorithms continue to improve, these limitations are likely to decrease over time.
How can I use Microsoft Designer's Image Creator for commercial purposes?
If you're considering using images created with Microsoft Designer's Image Creator for commercial purposes, such as in marketing materials, advertisements, or products for sale, it's important to understand and comply with Microsoft's usage guidelines and licensing terms.Microsoft typically grants users a license to use the images they generate for both personal and commercial purposes, but there may be some restrictions. For example, you may not be able to use the images in ways that violate Microsoft's community standards or infringe on the rights of others.It's also crucial to ensure that you have the necessary rights to use any third-party content that may be included in the images. For instance, if you're generating an image of a famous landmark, you should confirm that you have the right to use the landmark's likeness for commercial purposes.To fully understand the terms and conditions, refer to the official documentation and licensing agreements provided by Microsoft. If you have any questions or concerns, it's always advisable to seek legal advice to ensure compliance with all applicable laws and regulations.By carefully reviewing the usage guidelines and licensing terms, you can confidently use Microsoft Designer's Image Creator for commercial purposes.
Related article
 Swedish AI Startup Lovable Eyes $13.2 Billion Valuation After Major Funding Round
As AI-driven coding tools gain traction, Swedish startup Lovable has secured a major funding round. The company aims to raise $3 billion, potentially boosting its valuation to $13.2 billion—double the $6.6 billion recorded last December. Menlo Ventur
Google Tests Remy AI Agent for Gemini as Focus Shifts to User Control
According to Business Insider, Google is testing Remy, a new AI personal agent for Gemini. This tool aims to execute tasks on behalf of users, streamlining both professional workflows and daily routines.Currently, Remy is undergoing testing in an int
How to fix Core Web Vitals for better SEO rankings
Streamline Report Card Comments with AI ToolsIntroductionAI Tools for Generating Report Card CommentsMagic SchoolAlmanac AIChat GPTUsing Magic School to Generate Report Card CommentsLogging into Magic SchoolSelecting the Report Card Comments ToolCust
Related Special Topic Recommendations
writing
Swedish AI Startup Lovable Eyes $13.2 Billion Valuation After Major Funding Round
As AI-driven coding tools gain traction, Swedish startup Lovable has secured a major funding round. The company aims to raise $3 billion, potentially boosting its valuation to $13.2 billion—double the $6.6 billion recorded last December. Menlo Ventur
Google Tests Remy AI Agent for Gemini as Focus Shifts to User Control
According to Business Insider, Google is testing Remy, a new AI personal agent for Gemini. This tool aims to execute tasks on behalf of users, streamlining both professional workflows and daily routines.Currently, Remy is undergoing testing in an int
How to fix Core Web Vitals for better SEO rankings
Streamline Report Card Comments with AI ToolsIntroductionAI Tools for Generating Report Card CommentsMagic SchoolAlmanac AIChat GPTUsing Magic School to Generate Report Card CommentsLogging into Magic SchoolSelecting the Report Card Comments ToolCust
Related Special Topic Recommendations
writing
 Best AI Outline Generators for Long-Form SEO Articles
2026 Latest Best Top-Rated AI Outline Generators for Long-Form SEO Articles, meticulously curated by XIX.AI. These powerful tools offer game-changing assistance in creating high-quality content quickly, boosting writing efficiency significantly. Get a free vs paid comparison along with real-world tests and detailed rankings to help you find the must-try option that suits your needs. Explore now to unlock your AI edge.
 8 tools
 xix.ai
Education and Learning
AI Study Tools for Homework and Exam Prep
xix.ai
Education and Learning
AI Study Tools for Homework and Exam Prep
2026 Latest Best AI Study Tools for Homework and Exam Prep! XIX.AI curates a top-rated list of powerful, game-changing tools that help students boost productivity, streamline homework completion, and ace exams through real-world tests. Get a free vs paid comparison, detailed rankings, and must-try options to unlock your AI edge. Explore now!
10 tools
xix.ai
Music composition
AI Vocal Demo Tools for Songwriters, Hooks, Toplines, and Multilingual Draft Sessions
2026 Latest Best AI Vocal Demo Tools for Songwriters, Hook Creators, and Multi-Language Content Teams! XIX.AI has curated a top-rated list of powerful game-changing tools that go through rigorous real-world tests. You’ll find detailed free vs paid comparison data, comprehensive rankings, and must-try options to help you boost writing efficiency and unlock your creative potential. Explore now to discover your perfect tool for all your content needs!
9 tools
xix.ai
Business
Best AI Competitive Research Tools for Small Businesses
2026 Latest Best Top-rated AI Competitive Research Tools for Small Businesses! XIX.AI has curated a highly powerful game-changing collection, updated weekly with rigorous real-world tests and detailed rankings. You can find a comprehensive free vs paid comparison to help you identify the must-try tools that boost your productivity and give you a competitive edge. Explore now to discover your perfect tool!
9 tools
xix.ai
Image editing
Photoshop AI Retouch Tools for Ecommerce Apparel, Skin Cleanup, and Color Consistency
2026 Latest Best Photoshop AI retouch tools for ecommerce apparel, skin cleanup, and color consistency! This top-rated curated list features powerful game-changing solutions that help you boost writing efficiency, streamline content creation, and achieve perfect visual results effortlessly. Each tool has undergone real-world tests through weekly updated rankings, complete with free vs paid comparison details. Backed by XIX.AI, it’s the must-try guide for anyone aiming to unlock your AI edge. Explore now!
10 tools
xix.ai
Prompt
Best AI Prompt Libraries for ChatGPT Workflows
2026 Latest Best Top-Rated AI Prompt Libraries for optimizing all types of ChatGPT workflows. XIX.AI has curated a powerful, game-changing collection that goes through rigorous real-world tests to ensure top performance. You can find detailed free vs paid comparisons and expert rankings to help you choose the must-try tools that boost your productivity and unlock your AI edge. Explore now!
11 tools
xix.ai

 Comments (2)
0/500
Comments (2)
0/500
![EmmaTurner]()
Microsoft DesignerのAI画像生成機能、試してみたけど結構直感的で使いやすいね。ただ、プロンプトの微妙なニュアンスをどう調整すれば理想に近づくのか、まだコツが要りそう。他のツールと比べて何が強みなんだろう?🤔
![CharlesThomas]()
微軟設計師這個AI繪圖工具真的蠻直觀的,看完指南後試著做了幾張圖,效果比預期好!不過生成的人物手部細節有時還是有點怪,希望後續模型能再優化。對於平常需要快速做社群素材的人來說,應該是個不錯的起點。👍
Microsoft Designer provides an intuitive platform where you can bring your creative concepts to life using AI-generated images. This guide details the steps for crafting custom prompts, sharing them with others, and producing impressive visuals. Whether you're an experienced designer or new to the field, using AI for image creation can elevate your projects and simplify your workflow. Let's explore the capabilities of AI-powered design and learn how to craft engaging images with Microsoft Designer's Image Creator.
Key Points
Visit designer.microsoft.com to access Microsoft Designer's Image Creator.
Develop a custom prompt to produce specific AI-generated images.
Share your prompt as a reusable template for others to adapt.
Mark variable sections within the prompt to enable user personalization.
Download the resulting images for use in your various projects.
For optimal outcomes, focus on detail, avoid unsuitable language, and be mindful of potential AI inaccuracies.
Getting Started with Microsoft Designer Image Creator
Accessing the Image Creator
To start creating AI-powered images, first go to designer.microsoft.com
. This serves as the main hub for Microsoft Designer, offering a suite of AI-driven design tools. Make sure you have a Microsoft account; if not, you can sign up for free. After signing in, you'll see the Designer homepage, which presents various design options and tools. The Image Creator is easily accessible, letting you quickly begin generating visuals from your descriptions.
Using the Image Creator is simple. The interface guides you to enter a description of the image you have in mind. Microsoft's AI then processes your text to generate images that match your specifications. This approach is designed to be user-friendly, enabling people of all skill levels to create professional-looking images with ease.
By completing these initial steps, you're ready to harness the power of AI in your design process. Explore the possibilities, try different prompts, and observe how AI can enhance your creative work.
Understanding the Microsoft Designer Interface
After accessing the Image Creator
, take time to learn the interface to maximize its features. The main component is the Prompt box, where you type the description of the image you wish to generate. This box is your entry point to AI-driven creativity, so writing clear and detailed prompts is crucial for achieving the best results.
Below the prompt box, you'll often see examples and suggestions to spark your imagination. These can be useful if you're looking for starting points or need ideas to improve your prompts. The interface also lets you browse previously generated images, so you can review and adjust your past creations. Since Microsoft frequently updates the interface, keeping up with new features can improve your experience.
The interface includes areas to manage your projects, access tutorials, and engage with the wider Microsoft Designer community. Use these resources to broaden your knowledge, find inspiration, and solve any issues you face. Understanding the interface well allows you to use the tool effectively, experiment with prompts, and realize your creative potential.
Crafting and Sharing Custom Prompts
Creating Effective Prompts
Writing effective prompts is essential for generating the AI images you want. The more descriptive and precise your prompt, the better the AI can interpret your vision and deliver accurate outcomes. Here are some suggestions for creating compelling prompts:
- Be Specific: Use exact language to describe the components of your image. Include information about colors, objects, and the overall setting. For instance, instead of a vague prompt like 'a landscape,' try 'a sunset over snow-capped mountains with a frozen lake in the foreground'.
- Add Adjectives: Adjectives help clarify the qualities and features of your image. Use descriptive terms like 'vibrant', 'serene', 'dynamic', or 'whimsical' to convey specific emotions and styles.
- Consider the Style: Indicate the artistic style you prefer, such as 'photorealistic', 'watercolor', 'oil painting', or 'cartoon'. This guides the AI to align with your creative preferences.
- Include Context: Provide background to help the AI grasp the environment and relationships between elements. For example, 'a futuristic city at night' is more effective than just 'city'.
By including these elements in your prompts, you can direct the AI to produce images that closely reflect your creative intent, leading to more satisfying and impactful visuals.
Remember to keep experimenting with different prompts and refining them based on the images generated. This iterative process is key to mastering AI-driven image creation and achieving professional-quality results.
Sharing Prompts as Templates
Sharing prompts as templates
in Microsoft Designer’s Image Creator is an effective way to collaborate and inspire others. By converting your prompts into templates, you enable others to customize and adapt your creative ideas to their own requirements. This encourages collaboration and allows others to learn from your expertise.
To share your prompt as a template, follow these steps:
- Create Your Prompt: Begin by writing a detailed and effective prompt that produces an image you're happy with.
- Click 'Share': In the Image Creator interface, find the 'Share' button next to your prompt.
- Select 'Share as Template': Choose the option to share your prompt as a template. This opens a new window where you can adjust the template settings.
- Highlight Variable Fields: Identify the parts of the prompt that you want others to modify. These could include colors, objects, styles, or other descriptive aspects.
- Add Custom Fields: For each variable field, add a custom field that users can easily change. This makes the template user-friendly and adaptable to different creative visions.
- Generate and Share the Link: After customizing the template, create a shareable link. You can distribute this link to others, allowing them to access and use your prompt as a template.
By sharing your prompts as templates, you contribute to a collaborative creative environment and help others discover the potential of AI-driven image creation. Use this feature to extend your influence and foster innovation within the design community.
Customizing Shared Prompts
Customizing shared prompts is a crucial part of using templates effectively. When you receive a prompt shared as a template, you can adjust it to meet your specific creative needs, ensuring the generated images match your unique vision. Here's how to customize shared prompts:
- Access the Template: Click the shared link to open the prompt template in Microsoft Designer’s Image Creator.
- Identify Variable Fields: Examine the template to find the customizable fields marked by the creator. These fields are intended for easy modification to suit your preferences.
- Modify Custom Fields: Click on each custom field to input your desired values. You might alter colors, objects, styles, or other descriptive elements to tailor the prompt to your needs.
- Generate the Image: After modifying the custom fields, click the 'Generate' button to create an image from your customized prompt. The AI will process your changes and produce an image that reflects your unique vision.
- Refine and Experiment: If the generated image isn't what you expected, adjust your customizations and generate again. Try different values to achieve the desired outcome.
By customizing shared prompts, you can turn a general template into a highly specific and personalized creation. This process lets you benefit from others' expertise while maintaining your creative control, resulting in more innovative and impactful visuals. Embrace customization to explore the endless possibilities of AI-driven image generation.
Step-by-Step Guide to Using Microsoft Designer's Image Creator
Step 1: Accessing Microsoft Designer
First, you'll need to go to Microsoft Designer's website. Open your preferred web browser and type designer.microsoft.com into the address bar.Press Enter to load the page.
If you already have a Microsoft account (such as an Outlook or Xbox account), you can sign in with your credentials. If you don't have an account, you can create one for free. Look for the 'Sign Up' or 'Get Started' button and follow the instructions to set up your new account.
After signing in, you'll arrive at the main dashboard where you can explore the various design tools available in Microsoft Designer. This is your starting point for your AI-powered design journey.
Step 2: Navigating to Image Creator
Once you're on the Microsoft Designer dashboard, find the 'Image Creator' option.It's usually prominently displayed, often with a visual icon. Click on 'Image Creator' to open the AI image generation tool.
This will take you to the Image Creator interface where you can start entering your prompts to generate images. The interface is designed to be user-friendly, making it easy for both beginners and experienced designers to begin with AI image creation.
Step 3: Crafting and Entering Your Prompt
Now that you're in the Image Creator interface, you'll see a prompt box where you can enter your text description of the image you want to generate. This is where your creativity comes into play.
Think about the image you want to create and describe it in as much detail as possible. Consider:
- Subject: What is the main focus of the image?
- Setting: Where is the image taking place?
- Style: What artistic style do you want (e.g., photorealistic, cartoon, oil painting)?
- Colors: What colors should be prominent in the image?
- Mood: What emotion or feeling should the image evoke?
For example, instead of simply writing 'a cat,' you could write 'a fluffy ginger cat sitting on a windowsill bathed in golden sunlight, photorealistic style.'
Once you're satisfied with your prompt, enter it into the prompt box.
To enhance your prompting skills, consider the following table of prompt components:
| Component | Description | Example |
|---|---|---|
| Subject | The main focus of the image | 'A majestic lion' |
| Setting | The environment or location where the image takes place | 'in a vibrant African savanna' |
| Style | The artistic style you want to emulate | 'oil painting style' |
| Colors | The dominant colors that should be present in the image | 'with warm, earthy tones' |
| Mood | The emotion or feeling the image should convey | 'evoking a sense of tranquility' |
| Camera Angle | Perspective from which the image is captured | 'wide-angle shot' |
| Lighting | The type and direction of lighting in the image | 'soft, diffused lighting' |
| Resolution/Detail | Level of detail and sharpness in the image | 'high resolution' |
| Extra Details | Any additional elements or features to include | 'with a gentle breeze blowing through its mane' |
Using the right terminology in your prompts helps the AI better understand the subtleties of your request, improving the relevance and quality of the generated image.
Step 4: Generating the Image
After you've entered your prompt, click the 'Generate' button.
Microsoft Designer will now use its AI algorithms to create images based on your description.
The generation process may take a few moments, depending on the complexity of your prompt. Be patient and wait for the images to appear. Typically, the system provides 3-4 different versions of the image based on your prompt, allowing you to choose the one that best fits your vision.
Step 5: Reviewing and Downloading Your Image
Once the images are generated, take some time to review them. Consider which one best matches your vision and the details in your prompt.
If you're not satisfied with the results, you can refine your prompt and generate again. Experiment with different wording, add more details, or change the style to see how it affects the output.
Once you find an image you like, click on it to open a larger view. You'll see options to download the image to your computer. The image will be saved in a high-quality format that you can use in your design projects or share with others . You can also copy the image.
By following these steps, you can easily create and download impressive AI-generated images using Microsoft Designer, enhancing your creative workflow and bringing your ideas to life.
Microsoft Designer Pricing and Plans
Understanding the Cost
Microsoft Designer aims to be accessible to a broad audience, including students, educators, and creative professionals. The pricing structure reflects this goal by offering a combination of free and premium options. The free version of Microsoft Designer gives you access to core features, allowing you to explore AI-driven design without any initial cost.
For more advanced capabilities, Microsoft provides premium plans that are often included with Microsoft 365 subscriptions. These plans unlock additional features, such as higher-resolution image generation, priority processing, and expanded storage. Keep in mind that pricing can change, so it's wise to check the Microsoft Designer website or your Microsoft 365 account for the most current information.
Value Proposition of Premium Plans
Premium plans offer considerable value for users who need more robust design capabilities. These plans typically include:
- Higher-Resolution Images: Generate and download images with greater detail and clarity, suitable for professional projects and high-quality prints.
- Priority Processing: Enjoy faster image generation times, ensuring your prompts are processed quickly, even during busy periods.
- Expanded Storage: Store a larger number of generated images and design assets, helping you manage your creative work more efficiently.
- Exclusive Features: Access advanced AI features and tools not available in the free version, giving you a competitive advantage in your design workflow.
These benefits make premium plans a valuable investment for designers who rely on Microsoft Designer for their professional projects.
Pros and Cons of Microsoft Designer's Image Creator
Pros
User-friendly interface suitable for beginners.
Seamless integration with other Microsoft products.
AI-powered image generation for quick and easy creation of visuals.
Custom prompt creation for tailored results.
Prompt sharing as templates for collaboration and inspiration.
Cons
Dependence on AI algorithms, which may not always perfectly match user intent.
Limitations on generating certain types of content due to community standards.
Fewer customization options compared to more advanced AI image generation tools.
Potential for 'hallucinations' (inaccurate or nonsensical image elements).
Key Features of Microsoft Designer's Image Creator
AI-Powered Image Generation
At its core, Microsoft Designer's Image Creator uses advanced AI algorithms to convert text prompts into stunning visuals. These algorithms are trained on extensive datasets of images and artistic styles, enabling them to interpret a wide variety of descriptions and generate images that closely align with the user's intent. The AI can understand nuances in language, allowing for creative and expressive prompts that result in highly detailed and accurate images.
Custom Prompt Creation
The ability to create custom prompts
is a fundamental feature of the Image Creator. Users can input detailed text descriptions, specifying the subject, setting, style, colors, and mood of the desired image. This level of customization empowers users to bring their unique creative visions to life and generate images tailored to their specific needs. The more descriptive and specific the prompt, the better the AI can understand and execute the user's intent.
Prompt Sharing as Templates
Microsoft Designer allows users to share their custom prompts as templates, enabling others to benefit from their creative expertise. By highlighting variable fields within the prompt, creators can let others customize key elements, such as colors, objects, or styles. This feature promotes collaboration and encourages a community-driven approach to AI-powered image generation.
Image Downloading and Sharing
Once an image is generated, users can easily download it in a high-quality format for use in their projects. The Image Creator also provides options to share images directly to social media platforms or other design tools, streamlining the workflow and making it simple to integrate AI-generated visuals into a broader creative process. The ability to quickly download and share images enhances the overall user experience and encourages the adoption of AI in design.
Reminders and Tips for Optimal Results
To help users achieve the best possible results, Microsoft Designer offers reminders and tips for effective AI image generation. These include guidance on crafting detailed prompts, avoiding inappropriate language, and being aware of potential 'hallucinations' (inaccurate or nonsensical image elements). By following these recommendations, users can improve the accuracy and quality of their generated images.
Practical Use Cases for Microsoft Designer's Image Creator
Educational Projects
Microsoft Designer’s Image Creator
is a valuable tool for educational projects. Students can use it to generate visuals for presentations, reports, and assignments, enhancing their learning experience and making their work more engaging. Teachers can create custom graphics for lesson plans, classroom materials, and educational games, improving the quality of their instruction.
Marketing and Social Media Content
Businesses and marketers can leverage the Image Creator to produce compelling visuals for their marketing campaigns and social media content. They can generate custom graphics for ads, blog posts, and social media updates, attracting attention and driving engagement. The AI-powered image generation can also help create consistent branding across different platforms.
Personal Creative Projects
Individuals can use the Image Creator for a wide range of personal creative projects. They can generate custom artwork for their websites, blogs, or social media profiles, expressing their unique style and personality. The Image Creator can also be used to produce personalized gifts, greeting cards, and invitations, adding a special touch to personal occasions.
Design Mockups and Prototypes
Designers and developers can use the Image Creator to quickly generate mockups and prototypes for their projects. They can visualize design concepts and experiment with different styles and layouts, streamlining the design process and improving collaboration with clients and stakeholders. The AI-powered image generation can also help create realistic previews of products and interfaces.
Frequently Asked Questions
What is Microsoft Designer's Image Creator?
Microsoft Designer's Image Creator is an AI-powered tool that generates images from text prompts. It allows users to create custom visuals by simply describing the image they want to generate. This tool is part of the Microsoft Designer suite and is designed to be user-friendly for both beginners and experienced designers.
How do I access the Image Creator?
To access the Image Creator, go to designer.microsoft.com . You'll need a Microsoft account to sign in. If you don't have one, you can create one for free. After signing in, look for the Image Creator option and click on it to start generating images.
Is Microsoft Designer's Image Creator free?
Microsoft Designer offers a mix of free and premium options. The free version provides access to core features, allowing users to explore AI-driven design without any upfront costs. For more advanced functionalities, Microsoft offers premium plans that are often bundled with Microsoft 365 subscriptions.
What are some tips for crafting effective prompts?
To craft effective prompts:Be specific with your descriptions.Use descriptive adjectives.Specify the desired artistic style.Provide context to help the AI understand the scene.Experiment and refine your prompts based on the generated images.
How can I share my prompts as templates?
To share your prompts as templates, create your prompt, click the 'Share' button, select 'Share as Template,' highlight variable fields, add custom fields, and generate a shareable link. This allows others to customize and use your prompt.
What should I do if the generated image doesn't match my expectations?
If the generated image doesn't meet your expectations, refine your prompt and generate again. Experiment with different wording, add more details, or change the style to see how it affects the output.
What are 'hallucinations' in AI image generation?
'Hallucinations' occur when the AI generates incorrect or nonsensical image elements. To minimize this, avoid generating with the same prompt more than 10 times and ensure your prompts are clear and specific.
Related Questions
How does Microsoft Designer's Image Creator compare to other AI image generation tools?
Microsoft Designer’s Image Creator offers a user-friendly interface and seamless integration with other Microsoft products. While other AI image generation tools like DALL-E 2, Midjourney, and Stable Diffusion provide advanced customization options, Microsoft Designer stands out for its ease of use and accessibility for beginners.DALL-E 2, developed by OpenAI, is known for generating highly detailed and creative images from text prompts. It offers a wide range of customization options, allowing users to fine-tune their creations. However, it requires a paid subscription and can be more complex to use than Microsoft Designer.Midjourney is another popular AI image generation tool that operates through a Discord server. It is renowned for its artistic and surreal image outputs, making it a favorite among digital artists and designers. However, its reliance on a Discord interface can be less intuitive for some users.Stable Diffusion is an open-source AI image generation model that offers exceptional flexibility and customization. It allows users to run the model on their own hardware, providing complete control over the image generation process. However, it requires technical expertise to set up and use effectively.Overall, Microsoft Designer’s Image Creator strikes a balance between ease of use and functionality, making it an excellent choice for users who want to quickly generate high-quality images without a steep learning curve.
What are the limitations of Microsoft Designer's Image Creator?
While Microsoft Designer’s Image Creator is a powerful tool, it has some limitations. These include:Dependence on AI Algorithms: The quality of the generated images relies heavily on the underlying AI algorithms. Although these algorithms are continually improving, they may not always produce images that perfectly match the user's intent.Inability to Generate Certain Content: The Image Creator is designed to follow Microsoft's community standards and guidelines. As a result, it may not generate images that are sexually suggestive, violent, or otherwise inappropriate.Limited Customization Options: Compared to more advanced AI image generation tools, Microsoft Designer offers fewer customization options. Users may have less control over the fine details of their creations.Potential for 'Hallucinations': As with any AI-powered tool, there is a possibility that the Image Creator may generate inaccurate or nonsensical image elements ('hallucinations'). Users should carefully review the generated images and refine their prompts if needed.Despite these limitations, Microsoft Designer’s Image Creator remains a valuable tool for generating custom visuals quickly and easily. As the AI algorithms continue to improve, these limitations are likely to decrease over time.
How can I use Microsoft Designer's Image Creator for commercial purposes?
If you're considering using images created with Microsoft Designer's Image Creator for commercial purposes, such as in marketing materials, advertisements, or products for sale, it's important to understand and comply with Microsoft's usage guidelines and licensing terms.Microsoft typically grants users a license to use the images they generate for both personal and commercial purposes, but there may be some restrictions. For example, you may not be able to use the images in ways that violate Microsoft's community standards or infringe on the rights of others.It's also crucial to ensure that you have the necessary rights to use any third-party content that may be included in the images. For instance, if you're generating an image of a famous landmark, you should confirm that you have the right to use the landmark's likeness for commercial purposes.To fully understand the terms and conditions, refer to the official documentation and licensing agreements provided by Microsoft. If you have any questions or concerns, it's always advisable to seek legal advice to ensure compliance with all applicable laws and regulations.By carefully reviewing the usage guidelines and licensing terms, you can confidently use Microsoft Designer's Image Creator for commercial purposes.








 Swedish AI Startup Lovable Eyes $13.2 Billion Valuation After Major Funding Round
As AI-driven coding tools gain traction, Swedish startup Lovable has secured a major funding round. The company aims to raise $3 billion, potentially boosting its valuation to $13.2 billion—double the $6.6 billion recorded last December. Menlo Ventur
Google Tests Remy AI Agent for Gemini as Focus Shifts to User Control
According to Business Insider, Google is testing Remy, a new AI personal agent for Gemini. This tool aims to execute tasks on behalf of users, streamlining both professional workflows and daily routines.Currently, Remy is undergoing testing in an int
Swedish AI Startup Lovable Eyes $13.2 Billion Valuation After Major Funding Round
As AI-driven coding tools gain traction, Swedish startup Lovable has secured a major funding round. The company aims to raise $3 billion, potentially boosting its valuation to $13.2 billion—double the $6.6 billion recorded last December. Menlo Ventur
Google Tests Remy AI Agent for Gemini as Focus Shifts to User Control
According to Business Insider, Google is testing Remy, a new AI personal agent for Gemini. This tool aims to execute tasks on behalf of users, streamlining both professional workflows and daily routines.Currently, Remy is undergoing testing in an int
 How to fix Core Web Vitals for better SEO rankings
Streamline Report Card Comments with AI ToolsIntroductionAI Tools for Generating Report Card CommentsMagic SchoolAlmanac AIChat GPTUsing Magic School to Generate Report Card CommentsLogging into Magic SchoolSelecting the Report Card Comments ToolCust
How to fix Core Web Vitals for better SEO rankings
Streamline Report Card Comments with AI ToolsIntroductionAI Tools for Generating Report Card CommentsMagic SchoolAlmanac AIChat GPTUsing Magic School to Generate Report Card CommentsLogging into Magic SchoolSelecting the Report Card Comments ToolCust
2026 Latest Best Top-Rated AI Outline Generators for Long-Form SEO Articles, meticulously curated by XIX.AI. These powerful tools offer game-changing assistance in creating high-quality content quickly, boosting writing efficiency significantly. Get a free vs paid comparison along with real-world tests and detailed rankings to help you find the must-try option that suits your needs. Explore now to unlock your AI edge.
8 tools
xix.ai

2026 Latest Best AI Study Tools for Homework and Exam Prep! XIX.AI curates a top-rated list of powerful, game-changing tools that help students boost productivity, streamline homework completion, and ace exams through real-world tests. Get a free vs paid comparison, detailed rankings, and must-try options to unlock your AI edge. Explore now!
10 tools
xix.ai
2026 Latest Best AI Vocal Demo Tools for Songwriters, Hook Creators, and Multi-Language Content Teams! XIX.AI has curated a top-rated list of powerful game-changing tools that go through rigorous real-world tests. You’ll find detailed free vs paid comparison data, comprehensive rankings, and must-try options to help you boost writing efficiency and unlock your creative potential. Explore now to discover your perfect tool for all your content needs!
9 tools
xix.ai

2026 Latest Best Top-rated AI Competitive Research Tools for Small Businesses! XIX.AI has curated a highly powerful game-changing collection, updated weekly with rigorous real-world tests and detailed rankings. You can find a comprehensive free vs paid comparison to help you identify the must-try tools that boost your productivity and give you a competitive edge. Explore now to discover your perfect tool!
9 tools
xix.ai

2026 Latest Best Photoshop AI retouch tools for ecommerce apparel, skin cleanup, and color consistency! This top-rated curated list features powerful game-changing solutions that help you boost writing efficiency, streamline content creation, and achieve perfect visual results effortlessly. Each tool has undergone real-world tests through weekly updated rankings, complete with free vs paid comparison details. Backed by XIX.AI, it’s the must-try guide for anyone aiming to unlock your AI edge. Explore now!
10 tools
xix.ai
2026 Latest Best Top-Rated AI Prompt Libraries for optimizing all types of ChatGPT workflows. XIX.AI has curated a powerful, game-changing collection that goes through rigorous real-world tests to ensure top performance. You can find detailed free vs paid comparisons and expert rankings to help you choose the must-try tools that boost your productivity and unlock your AI edge. Explore now!
11 tools
xix.ai

Microsoft DesignerのAI画像生成機能、試してみたけど結構直感的で使いやすいね。ただ、プロンプトの微妙なニュアンスをどう調整すれば理想に近づくのか、まだコツが要りそう。他のツールと比べて何が強みなんだろう?🤔
微軟設計師這個AI繪圖工具真的蠻直觀的,看完指南後試著做了幾張圖,效果比預期好!不過生成的人物手部細節有時還是有點怪,希望後續模型能再優化。對於平常需要快速做社群素材的人來說,應該是個不錯的起點。👍